
Battle System Explained — Resonance of Fate Combat
Battle system explained for Resonance of Fate Enhanced Remaster: turns, Hero Actions, Tri-Attacks, scratch vs direct damage, and the Hero Gauge.
FAQ
Is Resonance of Fate turn-based or real-time?
What is the core damage loop in combat?
What are Bezels used for?
How do Resonance Points relate to Tri-Attack?
Did Enhanced Remaster change the battle system?
Where should I go after this overview?
One fight in Resonance of Fate is a loop of plan → move under pressure → spend Bezels on Hero Actions → chain scratch into direct damage. The sections below follow that order and point to deeper pages for each mechanic.
How does a battle turn actually work?
Each party member gets a turn with a blue Action Bar under their name. You can reposition until that bar runs out. Standing still freezes time; the moment you move, charge, or fire, enemy charge meters advance and they can shoot the active character.
Normal attacks work like movement: you hold to charge, press again to fire at the shown multiplier, or cancel to keep moving. If the Action Bar empties before you confirm a shot, the turn ends with no attack. Charge speed depends on distance—closer targets charge faster but expose you more.
In-game Tips screens and Erickdesu’s Steam beginner guide describe the same loop: enemies charge from idle → mid-charge → attack, and they usually advance while your active hunter moves. Hero Actions are the main way to reposition while you watch those meters.
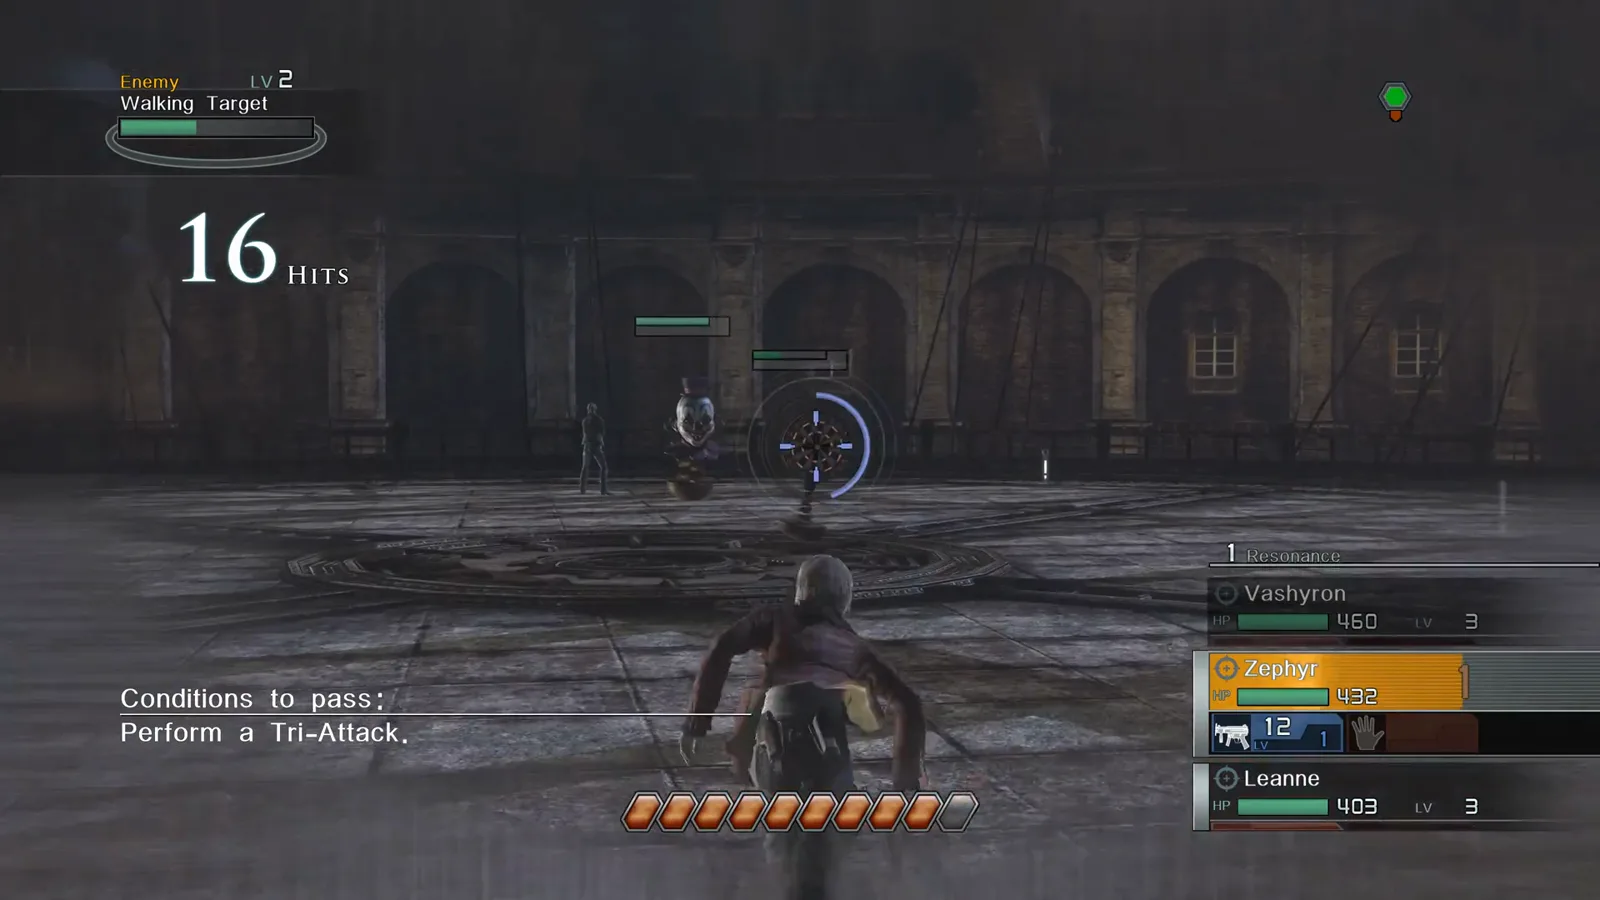
That training frame shows the party status panel, Resonance counter, and Hero Gauge you will see in field fights too.
What are scratch damage and direct damage?
| Type | Color | Typical weapons | Effect |
|---|---|---|---|
| Scratch | Blue | Machine guns | Fills a temporary blue bar; does not permanently reduce green HP by itself |
| Direct | Red / orange numbers | Handguns; thrown weapons (grenades also stun, break gauges, and can scratch by element) | Removes green HP and converts existing scratch into direct loss |
The Combat 3: Scratch Damage tutorial states scratch recovers over time unless you follow up with direct damage, and that a higher scratch-to-HP ratio slows recovery. Machine guns build the blue bar; handguns and grenades detonate it.
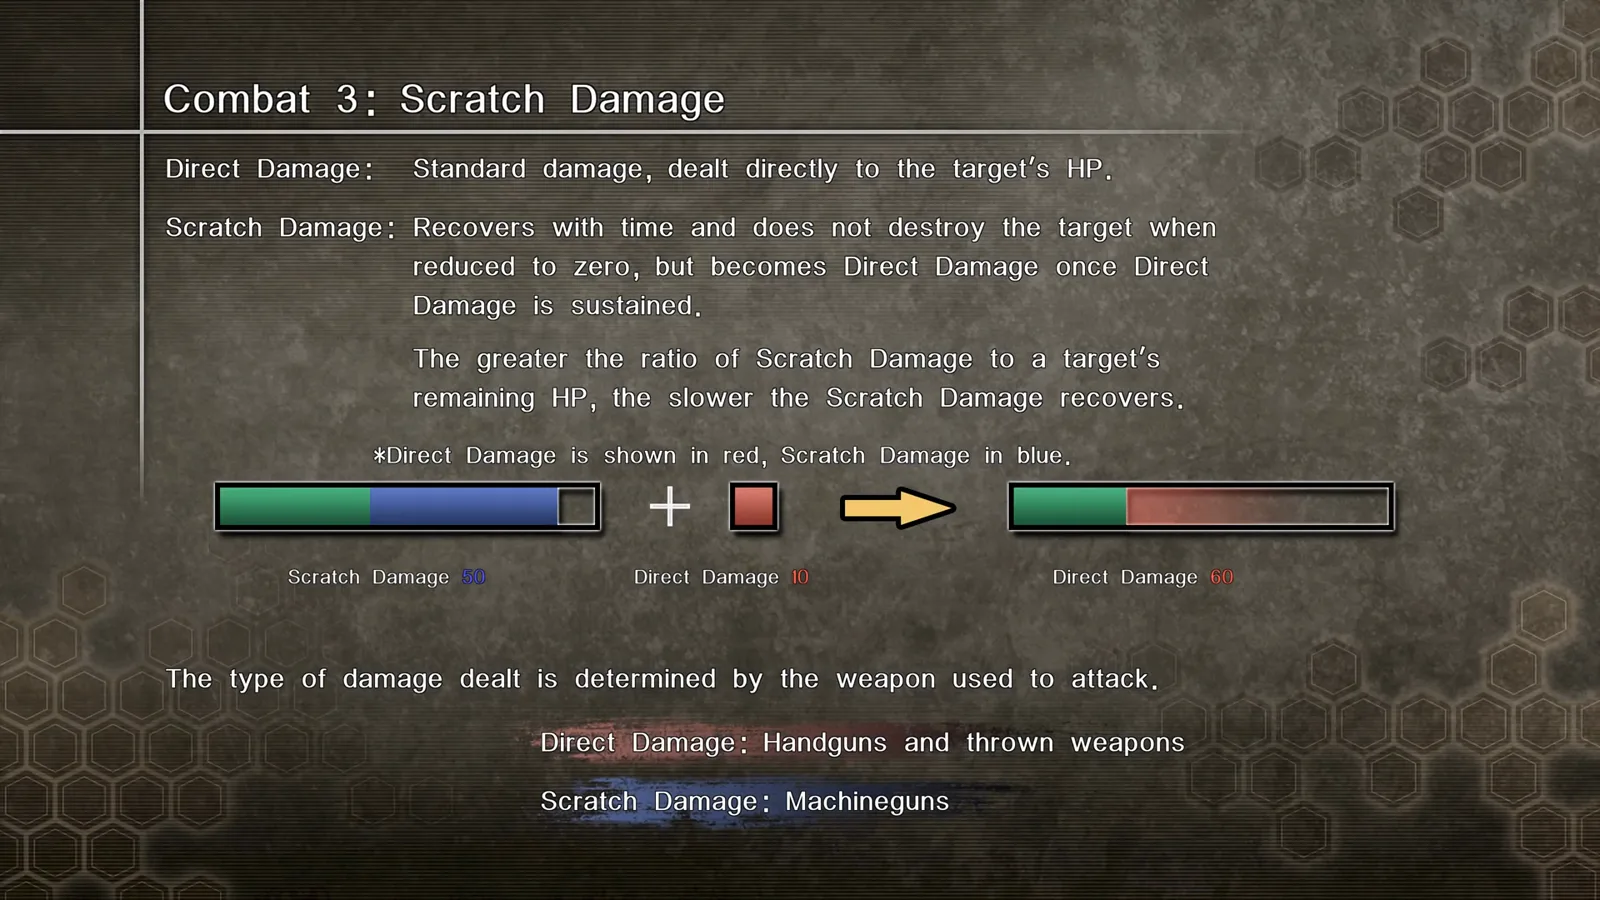
For matchup details and weapon-specific tips, see /guides/scratch-damage-vs-direct-damage/ and /weapons/weapon-types-explained/.
What are Hero Actions and Tri-Attacks?
Hero Actions let you draw a path, spend one Bezel, and run that route while firing and jumping. You can stop on the ground with cancel; jumps commit until you land or hit a wall. Full input notes live in /guides/hero-action-guide/.
Tri-Attacks spend one Bezel but require at least one Resonance Point. All three characters run a triangle based on their positions; stored Resonance adds extra laps. Setup and routing are covered in /guides/tri-attack-and-resonance-points/.
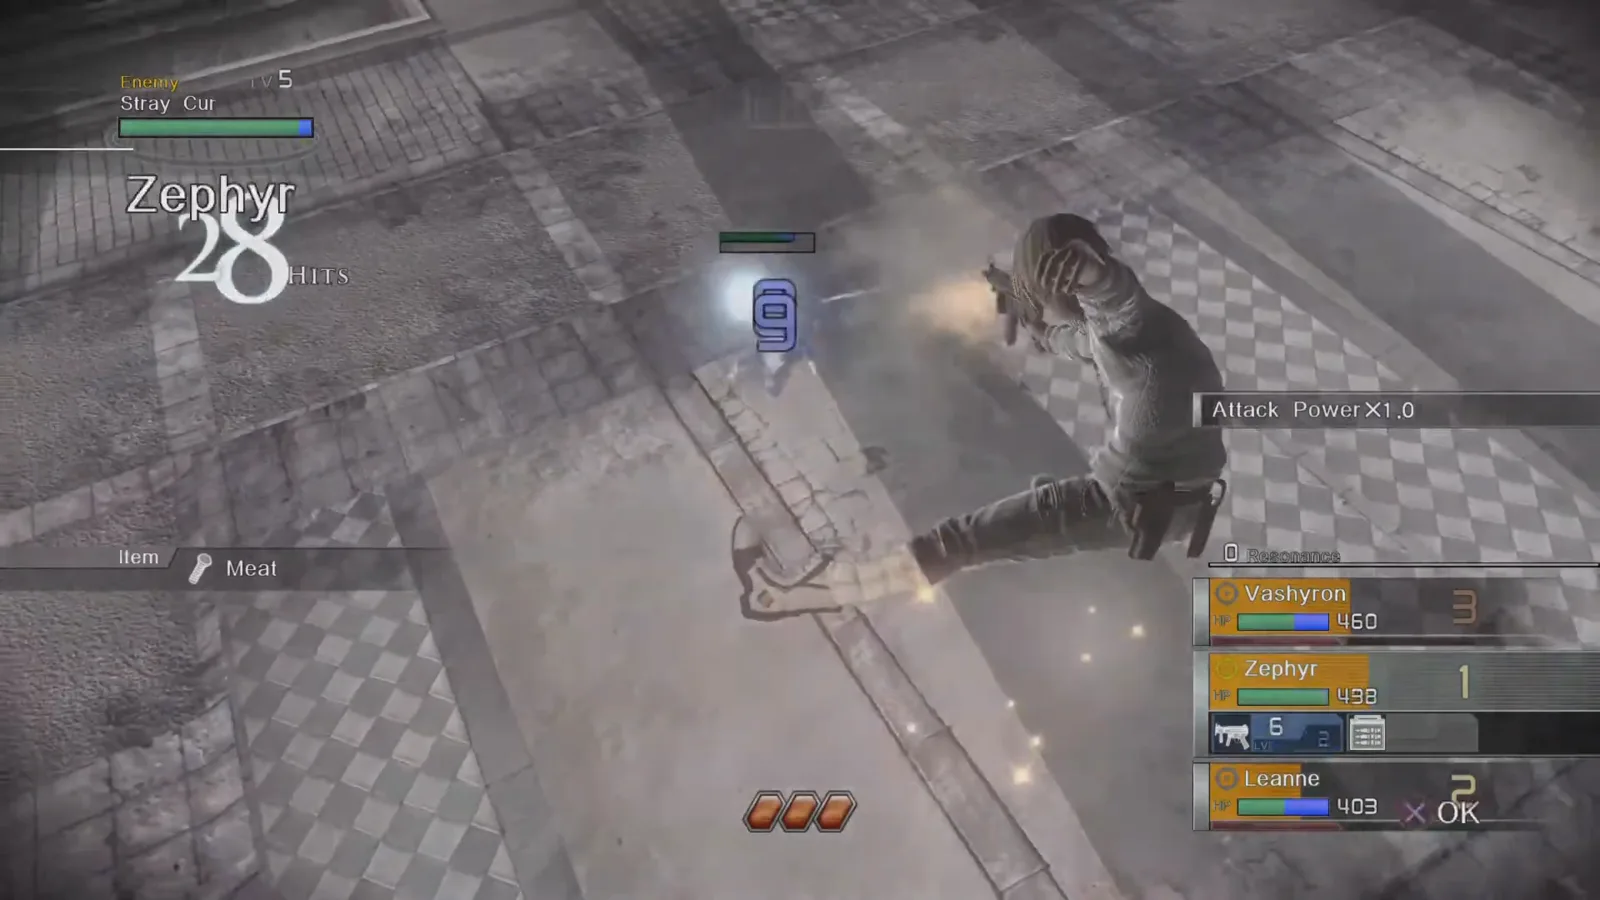
The screenshot above is real field combat (not the arena): note scratch numbers in blue, the shrinking Bezel row, and the active Action Bar on Zephyr.
How do Bezels and the Hero Gauge protect you?
Bezels are the orange segments along the bottom Hero Gauge. They fuel Hero Actions and act as a buffer: while you have intact Bezels, incoming hits shatter segments instead of deleting HP. Empty gauge triggers Critical Condition—slower attacks, no Hero Actions, and incoming damage hits HP directly.
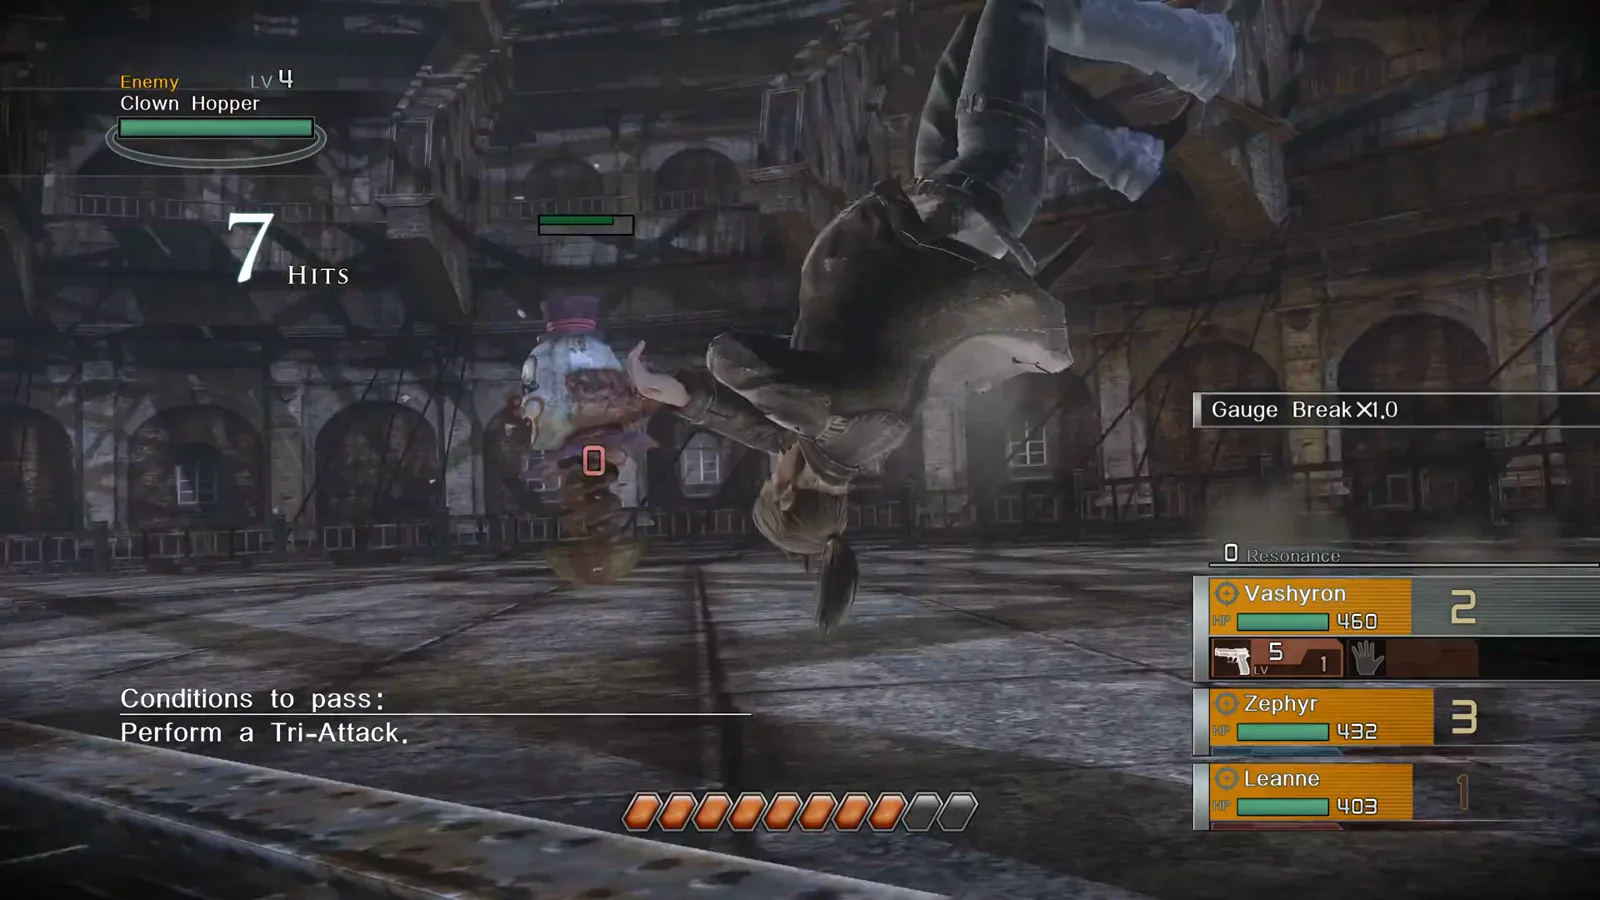
Shards scatter when Bezels break; picking them up restores segments. Gauge breaks crack the enemy’s main HP bar on handgun direct hits (Combat 13); destroying shield parts, wiping all enemies, resting at Base, and Energy Stations also refill Bezels (Tips 2 / threetimes). See /guides/bezels-and-bezel-shards/ for shard pickup rules.
While Bezels remain, lethal hits knock a hunter down and shatter a Bezel into shards instead of deleting green HP (Wikipedia combat summary matches the tutorial knockdown behavior).
What is a practical round for beginners?
- Open with machine guns to scratch groups, or break shield segments with handgun ground shots if a part blocks your angle.
- Spend one Bezel on a Hero Action to reposition safely and build Resonance by crossing ally lines when possible.
- Detonate scratch with a handgun or grenade on the same target.
- When Resonance is at least 1, Tri-Attack big targets or clustered enemies.
- Pick up orange shards if Bezels break; retreat to cover if the gauge empties.
Pair roles with /weapons/best-gun-setup/ once you know who carries SMGs versus handguns. /guides/beginner-guide/ covers progression between fights.
To see this loop under real pressure, read /bosses/tar-man/ (Chapter 1 oil pit and bezel budgeting) and /bosses/tesla-tortoise/ (Chapter 2 scratch plates, side Hero runs, and Tri-Attack burst).
Optional video walkthrough

Resonance of Fate 4K HD Edition combat tutorials
Sources
- Erickdesu — Basic Beginner guide (Steam Community)
- threetimes — Resonance of Fate FAQ / walkthrough (Combat 3–6, Tips 2)
- Wikipedia — Resonance of Fate gameplay section
- Xorbius — Resonance Of Fate 4K/HD Edition (PC) 4K Tutorials (YouTube, video ID
eA6D7sVDh3I) - Footage frames: Xorbius — Resonance Of Fate 4K/HD Edition (PC) 4K Tutorials (YouTube)
- Footage frames: NickOfFord — Resonance of fate (PS5) - [Hard] Prologue (YouTube, video ID
BZvjTOYnyTA)
Last verified: 2026-10-31
Related Articles
bosses
Tar Man Boss Guide — Chapter 1 Lucia Boss Fight
Tar Man boss strategy for Resonance of Fate Chapter 1: oil pit priority, Drum Carriers, cover boxes, and handgun finishers in the Lucia dungeon (Downtown area 5).
bosses
Tesla Tortoise Boss Guide — Chapter 2 Blackout Finale
Tesla Tortoise boss fight guide for Resonance of Fate Chapter 2: shock status, bunker cover, scratch body parts, and Metal-Coated MG ammo in Hughes Power Station.
guides
2× Game Speed in Enhanced Remaster — What It Does
Resonance of Fate Enhanced Remaster 2× game speed explained: field, battles, and events run faster. Benefits, limits, and what we could verify on menu footage.
Was this helpful?
Thanks for the feedback!