
Resonance of Fate Beginner Guide — First Hours Route
A practical Resonance of Fate beginner guide for Enhanced Remaster: prologue checklist, Arena training, map hex basics, and early mistakes to avoid.
FAQ
What should I do first in Resonance of Fate after the Prologue?
Do I need to understand Hero Actions immediately?
When should I upgrade weapons in the first chapter?
Should I spend special ammo on random street fights?
How does character level work at the start?
Is Enhanced Remaster different for this route?
What is the first-hours route in Resonance of Fate?
After the Prologue cutscenes you control Vashyron outside Sweet Home in Ebel City. The immediate loop is: read the Mission Memo, explore the base (save at the chalkboard, optional rest on the sofa), visit the Hunters Guild, then step onto the Level 4 world map and enter the Arena before you wander into Back Alley random battles. GameFAQs author threetimes stresses that the battle system is unusual enough that the Arena tutorial pays for itself even if you normally skip tutorials.
Default party gear at level 3 (threetimes Prologue notes): Vashyron carries the 1191.45 Auto handgun plus a grenade box, Zephyr carries the SMG-05 machine gun with a magazine case, and Leanne carries the B-N84 handgun with a first-aid kit. Leave this layout until you understand weight limits and scratch damage.
How do I handle the world map and Energy Hexes early?
Basel travel is locked until you place Energy Hexes on gray tiles. White hexes only open paths; colored hexes also power terminals later. threetimes lists ten shapes; each placed hex unlocks adjacent terrain.
The in-game tutorial (captured above from Prologue footage) explains that time passes on the map, Basel is split into levels linked by lifts, and descriptions can be toggled with the left stick prompt. Use R2 to zoom the map and walk only on Thoroughfare tiles until you are comfortable with night encounters.
Place your first white hexes toward the Arena rather than every Back Alley cone. Colored map tiles exist but need matching colored hex drops—usually from humanoid enemies near those tiles in later chapters (threetimes Prologue tip). For a deeper terminal and color-network breakdown, see the Energy Hex world map guide.
What combat basics must I learn in the Arena?
Run the Arena desk tutorial until Hero Actions, Resonance Points, and Tri-Attacks register. Erickdesu’s Steam guide summarizes the non-negotiables:
- Machine guns apply scratch damage (blue bar). They cannot kill on their own.
- Handguns and grenades apply direct damage and convert scratch into permanent HP loss.
- Bezels (orange pips on the Hero gauge) fuel Hero Actions; empty bezels trigger Critical Condition (slower charges, enemies hit your green HP directly).
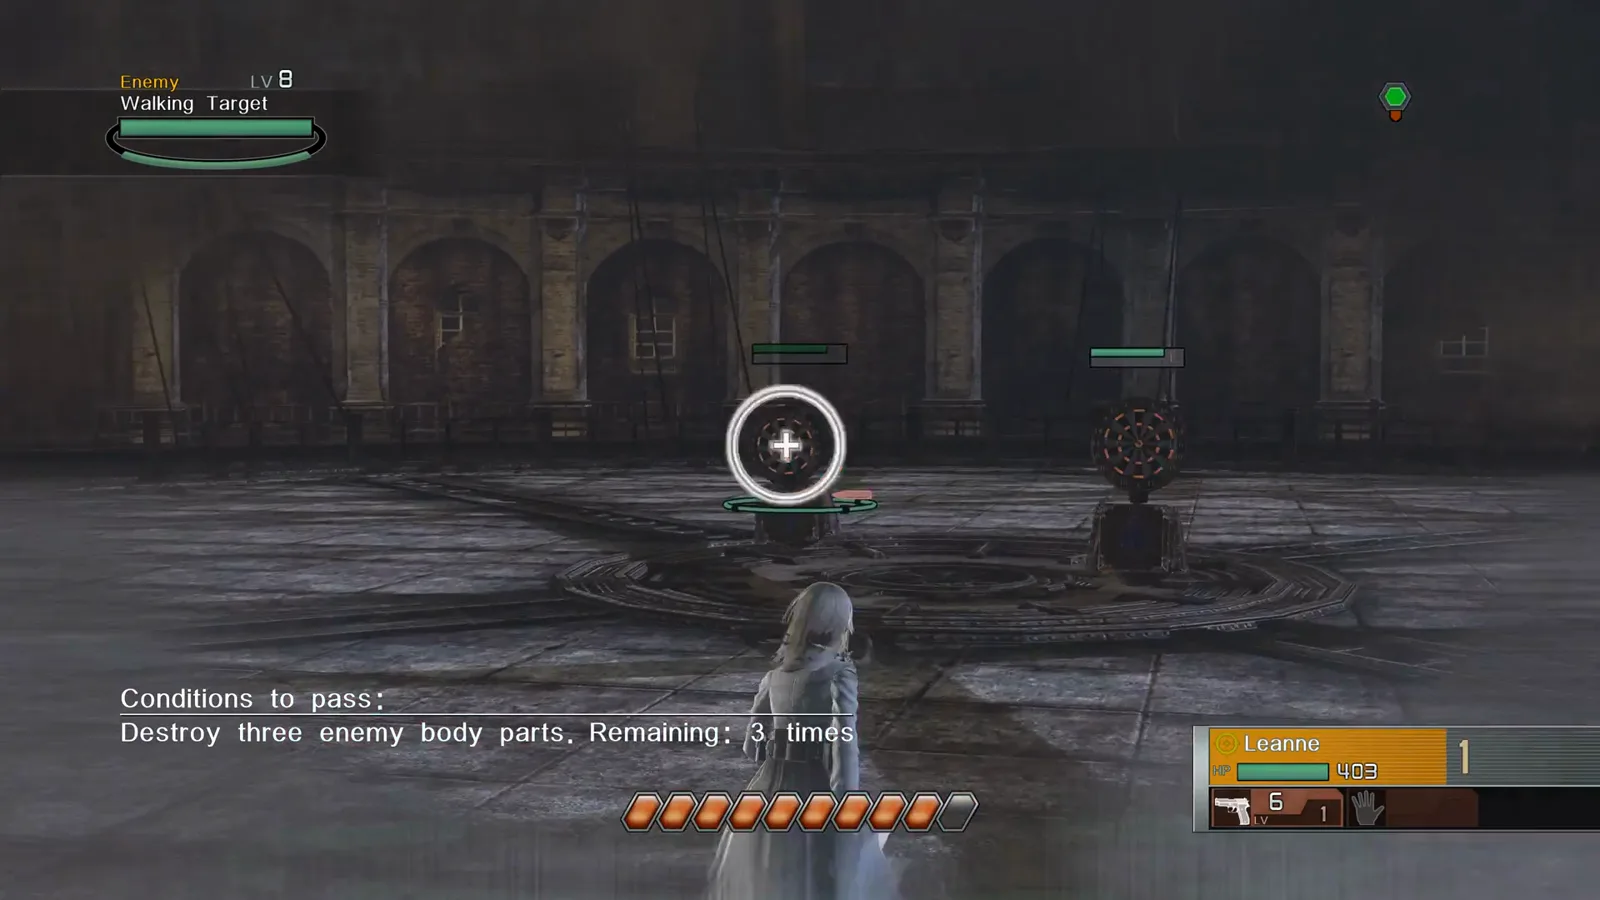
Movement drains the blue action bar while time flows; standing still freezes the battlefield. Cancel a charge if an enemy is about to interrupt you—wasting the whole bar ends your turn with no attack.

Resonance of Fate 4K HD Edition combat tutorial clips
What are common early mistakes to avoid?
Burning bezels on movement. Hero Actions are for repositioning and combo setup, not sprinting across empty rooms. Breaking enemy shields or wiping the squad refills bezels—see the Bezels and Bezel Shards guide when you start losing pips to HP damage.
Only leveling one weapon. Character level equals handgun + machine gun + thrown weapon levels. If Zephyr never throws grenades, his total level stalls even while the machine gun track climbs (Steam guide + threetimes leveling section).
Ignoring weight when customizing. Early Top Sight parts can make Zephyr’s machine gun too heavy for Leanne if she still carries a case. threetimes’ “Rookie Guide” block shows stat lines for Charge Speed, Magazine Size, and Weight on the customize screen—watch the right-hand carry limit.
Chasing every Back Alley at night. threetimes notes darker battlefields and more encounters after dark. Rest at Sweet Home to advance eight hours until you want the risk.
Skipping Guild missions before advancing chapters. Optional board quests in a chapter fail if you proceed without finishing them; that matters later for completion hunting even if you ignore it in hour one.
When should I spend Rubies, ammo, and upgrade parts?
Pick up visible glow items in Ebel City (Glass Shard, Custom Kit Set, Scrap Iron per threetimes). Once Chapter 1’s shop customization beat unlocks (TrueAchievements suggests 30,000+ Rubies on hand), buy scopes or Top Sight / Rookie Grip from the Tinkerer on Razzle Street and socket them on SMG-05 first. Details live in the weapon customization guide.
Hold Hollow-Point magazine rounds and hand grenades for scripted tough fights unless you are practicing in the Arena. Player comments on Erickdesu’s guide agree that routine mob fights should be cleared with scratch → direct loops, not consumable ammo.
How does Enhanced Remaster fit this route?
Remaster keeps story and systems intact; QoL such as 2× game speed only shortcuts travel and grind once you already know where you are going. If you are migrating from an older PC copy, read Enhanced Remaster vs 4K/HD Edition for ownership checks—not for combat changes.
Difficulty choice mainly affects enemy stats; NG+ rules about carried levels and bezels are explained on this setup screen. Pick Normal while learning; raise difficulty after Tri-Attacks feel comfortable.
Sources
- threetimes — Resonance of Fate Guide and Walkthrough (GameFAQs)
- Erickdesu — Basic Beginner guide (Steam Community)
- TrueAchievements — Story walkthrough part 4 (Prologue rewards)
- RPG Land — Battle system primer (Part 1)
- Footage frames: NickOfFord — Resonance of fate (PS5) - [Hard] Prologue (YouTube, video ID
BZvjTOYnyTA) - Footage frames: Xorbius — Resonance Of Fate 4K/HD Edition (PC) 4K Tutorials (YouTube, video ID
eA6D7sVDh3I)
Last verified: 2026-10-31
Related Articles
bosses
Tar Man Boss Guide — Chapter 1 Lucia Boss Fight
Tar Man boss strategy for Resonance of Fate Chapter 1: oil pit priority, Drum Carriers, cover boxes, and handgun finishers in the Lucia dungeon (Downtown area 5).
bosses
Tesla Tortoise Boss Guide — Chapter 2 Blackout Finale
Tesla Tortoise boss fight guide for Resonance of Fate Chapter 2: shock status, bunker cover, scratch body parts, and Metal-Coated MG ammo in Hughes Power Station.
guides
2× Game Speed in Enhanced Remaster — What It Does
Resonance of Fate Enhanced Remaster 2× game speed explained: field, battles, and events run faster. Benefits, limits, and what we could verify on menu footage.
Was this helpful?
Thanks for the feedback!